Showing posts with label teaching and learning. Show all posts

Tuesday, June 16, 2026

Chicago Museum Trips with Book Lists, a Baby, and a Limited Budget

In my previous post I shared about group field trips my teen daughter and I enjoyed with our Classical Conversations community.  For other field trips we struck out on our own.  This was my intention long before we knew about any group opportunities. 

Telescope at Adler Planetarium

Using the our DuSable Black History Museum membership, we were able to visit the Adler Planetarium for the first time.  After reading the novel Carry On, Mr. Bowditch as part of the Challenge A reading list, it was fascinating to see the planetarium's extensive collection of nautical instruments from centuries ago, when Nathaniel Bowditch was navigating his way around the globe. I still hope to visit another related place, the Chicago Maritime Museum, to learn more about local maritime history.

Chicago Style Hot Dog at CHM
Our whole family ventured out to the Chicago History Museum in January as well.  It was free for us to enter through our DuSable membership.  We had hoped to see the organ that Thomas Dorsey played when he wrote the hymn "Precious Lord, Take My Hand," but it was off display.  That song meant a lot to us as younger parents, and my daughter even requested that I sing it at her wedding.  We did get to recreate some playful memories of becoming a Chicago hot dog though!  Also this visit helped me prepare a Chicago history timeline activity, which is now available on the Teachers Pay Teachers platform. 

Pilsen Chicago Murals


Mexican Museum of Art in Pilsen

My little guy and I also visited the National Museum of Mexican Art in January, accompanied by my oldest daughter, who was finishing her senior year of college. She's an artist herself, and together we enjoyed taking in the rich colors and traditions on display in the various exhibit halls.  I was particularly interested in learning about the pioneering muralist Ray Patlan, as the Pilsen neighborhood is still well known for its murals.  Pilsen's murals also are a big feature of the novel Hello Beautiful, by Ann Napolitano, which was set in the same vibrant neighborhood.

And where else are we planning to go?  Chicago and its suburbs have many more places still beckoning us to visit and explore.  At the top of my list is the Pullman National Historical Park, which is free.  Next is the Osaka Garden in Jackson Park, followed by the Institute for the Study of Ancient Cultures Museum nearby at the University of Chicago.  

If you have been around Chicago, are there other budget-friendly places you recommend? If so, leave a comment!


Monday, June 15, 2026

If You Want to Hear God Laugh, Tell Him Your Plans

Since I last shared a post here, our family has grown!  Much to our surprise, a new baby arrived into the mix two years ago.  As a result, this past year we had three children in college, a daughter learning at home with the Classical Conversations (CC) curriculum and local CC community, and a curious toddler enchanting us all amidst the mayhem.  Our oldest daughter also got married last summer, and thus we have added an amazing son-in-law to the family as well!

Making a mid-life transition back to being the stay-at-home parent has been both tough and delightful.  Homeschooling with a baby was certainly not on my bingo card of life goals!  But in my late forties I know better how quickly delicate newborns transform into babbling babies and then energetic toddlers. And I can anticipate how suddenly children sprout into teens and then young adults.  Consequently, I tried hard to savor the early months with our youngest baby boy.

Meanwhile, as a parent who was brand new to the rhythms of homeschooling, I had many expectations that didn't match our challenging reality.  But thankfully my daughter has gotten some of her father's gifts of administration and she managed to stay on top of things. We also were buoyed by the weekly community day where she could interact with an experienced tutor and her peers. I doubt we would have made it through these past two years at home without that critical structure, support and accountability.

This past year I was thrilled that we were invited to go on field trips with the CC students and parents.  Field trips were one thing I was truly excited about doing once we decided to try homeschooling.  I even bought a membership to the DuSable Black History Museum because it offers reciprocal privileges at other museums and educational attractions.

Broken Wagon Bison Trip
For my teen daughter, going places with her friends added much more to the appeal. Last fall, we went on two field trips with the part of our CC community.  The first was a trip to Broken Wagon Bison, a local ranch in Hobart, Indiana.  Even before we heard about the group opportunity, I had already wanted to go there because we were reading the novel Little Britches: Father and I Were Ranchers, by Ralph Moody, as part of the Challenge B exposition (ELA) strand.

The second group field trip was to the Illinois Holocaust Museum Presents Experience360 in Chicago.  The exhibits were impactful, and we also heard a live presentation by a holocaust survivor who described how she hid with her sister in a barn in France. One reason we went here was to deepen our understanding of what Jewish people endured at that time, as a follow up to reading The Hiding Place, by Corrie Ten Boom.  The previous year, we also read Number the Stars, by Lois Lowry, which was set in Denmark.

Holocaust Survivor Presentation

During that first year of homeschooling, my daughter was learning world geography as part of the Challenge A (7th grade) debate strand (which equates to social studies).  Learning all fifty US states and  their capitals was one of the early assignments.  One day as we drove on the highway to Valparaiso, we spotted license plates and tried to name the capital of whichever state was on the plate.  I have since turned that interactive review activity we did into a printable page that tucks into a Geography Fold-and-Go Travel Kit with other printable activities, like ad lib fill-in stories, a prediction game, and a map of the US and Canada to color.  

We hope to go on a short road trip or two this summer and enjoy putting those screen-free activities into action.  Once school starts, our opportunities to roam for field trips and other adventures will diminish, especially since my 14-year-old is registered to attend the same local high school where her older siblings went. For the first time, it will likely be just me and my youngest son at home during school hours.  We will surely miss his big sister, as well as his brother and 20-something sisters and brother-in-law when they are away at college and in the workforce.

Wednesday, September 5, 2012

What We Are Not Sorry to Leave: No Child Left Behind


My daughter entering her new school in Canada

When educational policy turns teachers into taskmasters, no one wins.  Not the students, who are forced to spend most of their time on practicing what is going to be on the test.  Nor is teaching under the current policy in the U.S. that fulfilling for teachers, who are constrained to improve student test performance, rather than trusted to find ways to tailor their time in the classroom to engage the minds of their students.

So we are thankful to be away from those constraints, and have hopes for greater educational freedom in our new elementary school.  Children are eager to learn new things.   Most teachers genuinely want to help their students learn.  Our kids were blessed to have some excellent teachers in the U.S.  However, No Child Left Behind still seemed to hinder a love of learning among students, and it has driven many teachers to leave their profession after a few years or retire early.  While we wish that policy makers would GET A CLUE AND REPEAL NCLB, in the mean time our children and their teachers have been losing out on the best parts of education.  So our family is not sorry at all to be rebooting our children's school experience in Canada.

Every school has some shortcomings, but fewer top-down constraints means more room for learning and growth. And learning, not test scores, is what truly counts, right?  Meanwhile, K-12 education in the U.S. is pushing a generation of children to jump through hoops rather than fostering children's natural ability to learn and discover.  What our world needs are young adults who are truly educated, with the ability to think critically and continue to learn and innovate on their own.  We as parents are committed to working with our children and their teachers to make that more possible.  And without the shackles of NCLB up here, we believe our prospects are much better.

For families who are still in the U.S., the best thing to do is to urge policymakers to make real changes. Especially in an election year, let politicians know loudly and clearly that dissatisfied parents, teachers and children should not have to endure NCLB any longer.

Monday, April 16, 2012

Rainbow Games, Part 2: Using Paper and Felt

Instead of the Hunger Games, my kids and I have been exploring more cheerful themes, like rainbows.  My previous post featured games that get kids moving on a bigger scale.  These next activities involve more focused movements, like coloring and aiming smaller objects like coins or cotton balls.


Rainbow Board Games


1.  Color Toss Game

This could be a great waiting room activity when you have a wiggly toddler or preschooler along.  Or just play it at home because it's fun.


To Make It:

Cut a rainbow from 6 colors of felt.  Attach curves to a felt backing with thread or tacky glue. I decided to only attach the purple and leave the other 4 colors as puzzle pieces.


To Play:

Toss cotton balls and/or coins, aiming to get one to land on each color.

Variations: 

                   a) Use paint or paper scraps to create the rainbow on scrap cardboard
                       instead of using felt.


                   b) For a math challenge, assign point values to each color band.
                       Or add up the value of the coins that land on the rainbow.


2.  Rainbow Shuffleboard


To Make It:

Print out and color the rainbow page (scroll down below to find it).  Overlay the rainbow with a long sheet of waxed paper, about 2 to 3 feet long. 


To Play:

Slide coins or glass stones across the waxed paper toward the color bands on the rainbow.  Count up who gets the most objects to land on the rainbow.


Printable Rainbow Coloring Page


This post is linked to Show and Tell
and It's Playtime.


Thursday, April 12, 2012

Rainbow Games, Part 1: Using Chalk and Bins


Rainbows are a symbol of hope.  They illustrate the colors and wonder of creation and remind us of the promise given at the end of the story of Noah's ark.   I find the rainbow theme to be an inspiring springboard for learning and play.

Rainbow Games and Activities

1. The Rainbow Twist Game

Draw a giant rainbow on pavement with colored chalk.  With or without a Twister game spinner, call out right or left, hand or foot, and a color.


Variations:
  • Sometimes we make this a bilingual game by saying the names of the colors in Spanish or another target language.  For example, "left hand azul!"
  • You can turn this into a tossing game by using rolled up socks.  Aim to toss the sock ball onto each color band.


2. The Rainbow Clean Up Game

If it is time to clean up a fairly large mess of toys, papers, etc., enlist children to sort the objects based on their color and then put them away.


Tip: Provide a matching container for each color, or label containers before the clean up begins.  You may want to assign a particular color (or colors) to each child.


This post is linked to Show and Tell
and It's Playtime.


Friday, January 13, 2012

The Snowflake Stomp: A game to learn sight words and more!


We developed this snowflake word game last winter.  Today's frigid temperatures prompted me to set it up again for my 4-year-old son, who is now a pre-reader, and likes to move.


How to play:
  1. Set up the snowflakes and secure with tape.   Decide what version you'd like to play--sight words, letters, pictures or numbers.
  2. Call out or say a phrase that includes one of the words/ targets.  The child should step or stomp on that snowflake.
  3. After he or she has stomped on all of the targets, ask the child to choose a target word/ letter/ number and stomp on it.  Or the child can be a "caller" to instruct someone else where to stomp.

Helpful tips and options:
  • Tape page protectors lengthwise so that the opening is available to slide paper flashcards in and out. 
  • If using zipper bags, tape around the edges except for the opening, so you can insert and remove what is inside. 
  • Electrical tape or masking tape are probably superior to painters tape, which we used.
  • If your tape is not sticky enough, reinforce it with clear packing tape.
  • At first we wrote on the plastic with wet-erase overhead markers.  The ink rubbed off after playing the game, so I switched the text to paper flashcards placed under the clear plastic. 
  • We taped our plastic covered "snowflake quilt" onto a fleece blanket, which can be folded and reused, but you can also tape the snowflakes onto the floor/ carpet directly.
I'm linking this idea to Show & Share Saturday , Show and Tell and It's Playtime.

More snowflake-themed activities:

Snowflake Flying Disks
Snowflake Window Clings
Crystal Snowflake


Thursday, October 6, 2011

Crafts from Family Nature Night

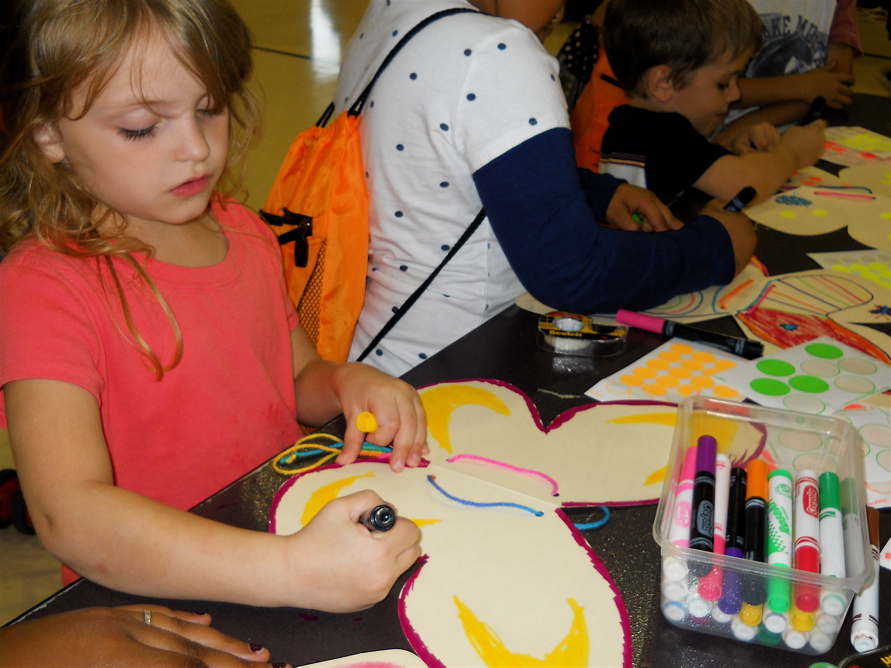
For weeks, my daughters have been looking forward to their first Family Nature Night.   This evening event was sponsored by the area Natural Resources Department and hosted in the gym of our elementary school.

The kids got make:

1. Beeswax candles


2. Fish with backbones
3. Shell and sand bracelets


4. TP roll binoculars


5. Butterfly wings

6. Soybean necklaces  (not pictured since it was our last craft of the night)

My children were jazzed about all the craft and live animal demonstration stations.  There was also a "fossil" dig and a hissing cockroach tractor pull.  Here's one of the racers in action:


Overall the evening was a smashing success.  I only wish they had more hands-on interaction with nature at school on a regular basis.  The focus on achievement tests basically sidelines such pursuits--at least for first and second graders in our local public schools.   Reading, writing, and arithmetic take up most of their school days, with only a few spare minutes for science and social studies.

Bad educational policy notwithstanding, my husband and I still have many opportunities to encourage our children to explore nature on their own, whether we're foraging for berries or interacting with insects in our own backyard.  It's up to us, the parents, to make sure their education is well-rounded and help keep their love of learning alive.


Find other adventurers this week over at Try New Adventures Thursday.

Monday, June 6, 2011

Our Alphabet Hunt = Backyard Treasures + Sidewalk Chalk

A few thoughts spring to mind when I think of spending the summer with my kids:

Anticipation of fun; apprehension about the change in routine
         Books to read; boredom to battle
                 Creative outdoor activities; creepy crawlies to study up close...

Last summer we made up songs and had fun together, with a bit of structure thrown in to keep the time from slipping away too haphazardly.  I intend to return to the summer activity calendars from Thriving Family again, but also am looking for more ways to spur fun and learning.

And happily, now I've got another resource in The We Teach: Summer Learning E-book. I joined the We Teach form to download it for free. 


we teach summer ebook button
 
The e-book is brimming with 25+ ideas to get our summer off to a great start. Today I'll share our variation on an idea from the literacy section of the e-book.  I loved Amy Mascott's idea to have a backyard alphabet hunt.  We simply made our hunt paperless.

What we did:

1.  Instead of a roll of paper we used pavement and sidewalk chalk.  We made a grid to write in the 26 letters.


2.  We filled in the grid with corresponding objects.
                                                                                                         
"R" is for rope,"V" is for vine, "W" is for wrapper, "S" is for stick...

Our "A" specimen was prone to wandering off the grid.


3.  We took Amy's idea one step further and tried to see what words we could spell with just the filled letters.  For a kinesthetic experience, we jumped on each letter square while spelling the word.  Fun for all!


Find more inspiration at Show and Tell this week!

Saturday, May 7, 2011

Kids Craft: Rough Skinned Sharks


Though we live far from their natural habitat, we can study sharks at close range whenever our family visits the aquarium at the Omaha zoo.  We also learn about sharks via books, such as Shark Attack! by Cathy East Dubowski.  Since my daughters and son are so fascinated by sharks, why not make some?  In doing so, we learned about different types of sharks and about the denticles on their skin.   These tiny teeth-like structures cannot be easily seen, but we can imagine what they might feel like after creating textured sharks.


Materials:

  • Sandpaper
  • Scissors
  • Crayons
  • Paper (not thick)
  • Shark printables (we used coloring pages from the Georgia Aquarium)


Directions:
  1. Print out or trace outlines of shark shapes onto regular copy paper.
  2. Place rough sandpaper under the paper with the shark outline.  Use the side of a crayon to color the shark, pressing down so that the texture of the top paper becomes rough.
  3. Cut out the sharks, feel the rough skin, and display.

Additional resources:


If you are looking for further information or lesson ideas, the Seaworld website has a helpful downloadable resource for teachers (and parents I assume), Rough Rubbin' Sharks, which I consulted before we made our sharks.

Check out Kids Get Crafty for many more creative project ideas.
This idea is also linked to Show and Tell at ABC and 123.

Saturday, April 30, 2011

Kids Craft: Sandpaper Castles

image credit
Sand and surf are icons of summer fun and relaxation.  But if you are inlanders like us, regular beach trips just aren't possible.  Though I have wistful memories of visits to the sandy shores of faraway places like Oregon, Vietnam, Thailand, and the Gulf Coast, my children unfortunately do not...yet.  If you live near a lovely wave-swept beach, count yourself blessed!

Nevertheless, crafting with sandpaper is possible almost anywhere.  These longer lasting sandpaper castles can be an outdoor or indoor craft.  Either way, castle builders might enjoy sporting swimsuits during the construction process.

Teaching Point: Earth Science
Along with constructing and decorating the sand castles, kids can learn about how sand forms.  Collect some different kinds of rocks and have kids rub two rocks together over a piece of paper.  Bits of softer rock should fall onto the paper, demonstrating how grains of sand are formed over time.  I know my kids enjoyed such a fun geology lesson, as will yours!

Materials:

  • Sandpaper sheets (we bought a variety pack for $1 at Dollar Tree)
  • Cups (washed and reused)
  • Cardboard beverage holder, optional
  • Cardboard tube from paper towels, optional
  • School glue or hot glue
  • Rubber bands, optional
  • Old scissors (since blades will get a little damaged from the sandpaper grit)
  • Decorations - such as shells, plastic gems, stones, foam stickers, etc.
  • Chalk, optional
  • Assorted rocks (preferably of varying hardnesses)
  • Paper
Directions:
  1. Wrap sandpaper around cups and secure with glue and rubber band or hot glue.  Allow glue to dry.
  2. Trim sandpaper and cut decorative square borders if desired.
  3. Decorate castles by gluing on shells, gems, and other found objects.  Add more color and details with chalk if desired.
  4. Optional: Show how sand grains are formed by rubbing various rocks together over paper.

Tuesday, March 1, 2011

10 Ways to Celebrate Dr. Seuss this Month

1.  Make green eggs and ham.

2.  Read several Dr. Seuss stories.
     Some of my favorites are:

Oh, the Thinks You Can Think!Dr. Seuss's ABC (I Can Read It All By Myself Beginner Books)One Fish Two Fish Red Fish Blue Fish (I Can Read It All by Myself)Horton Hears A Who!


3.  Download a free, fun Seuss unit.
     Choose your favorite age-appropriate activities to do.

4.  See if you can find a local production of the musical Seussical.
     My daughter and I enjoyed a high school production of this a couple of years ago.

5.  Dress up as a character from one of the Seuss books.

6.  Watch one of the vintage Dr. Seuss story cartoons on video
     [Sorry, I'm not a fan of the new TV spinoff series.]

7.  Count up how many of the Dr. Seuss books you have ever read.

8.  Do a favorite Seuss book roundtable.
     Each person shares which is their favorite book and why.

9.  Color and cut out Seuss characters to decorate a door or other area.

10.  Create your own puzzle from a Seussville printable.


How about you?
What's your favorite book by Seuss?
Which of these 10 ideas would you like to try? 


Top Ten {Tuesday}